by Steve | Feb 8, 2010 | Polymer Clay |
I’ve made polymer clay boxes in the past but normally they meant to be a container for a book. Normally, I make my boxes in one of two ways. I either bake all the parts and then assemble them with a second baking or bake the box on a mold that I’ve fabricated from wood or book board. The size of the box depends on the book I’ve made how how I want it to be presented, I also tend to keep these pieces small because of the sense of intimacy they create.
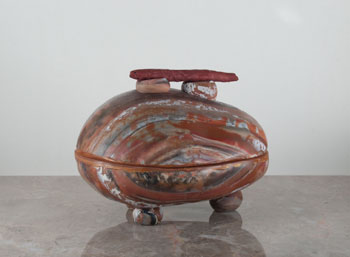
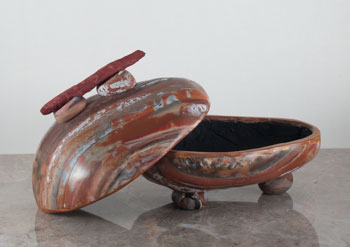
While I was at PLAY last week one of the options available was making rock boxes. For the most part a rock box involves little more that wrapping a rock in polymer clay and baking it. The technique isn’t significantly different then the one I use for making my boxes except for a couple of tricks for getting the box off the rock once it’s baked. I started the box pictured below while I was at PLAY, I’d been tinkering with making a journal cover using Mokume Gane and still had a large piece of it left over. To create the effect on the surface of the box I covered a base sheet of clay with slices of the Mokume Gane and then ran it all through the pasta machine several until the distortions resembled banded agate.
The dimensions of this box are about 4 1/2″ X 3 1/4″ and it’s about 3 3/4 high. The interior of the box is simply finished with a good quality black gesso. The exterior is was wet sanded with 600, 800 and 1200 grit sand paper and then buffed on my bench grinder.
by Steve | Feb 3, 2010 | Photography |
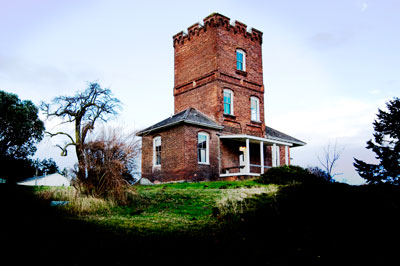
I’ve been taking photographs for as long as I can remember and like many others they get incorporated into my journals. I’m a also a big fan of “experimental” photography and I’d say that Lomography falls into that category. For those who don’t know, Lomography is a art movement that has grown up around the Lomo camera. Originally produced in Russia and now in China, the noteworthy feature of the camera is it’s imperfections. The manufacturing process creates a lens that creates vignetting and distortions in the image and the distortions vary from camera to camera. Images from Lomo cameras tend to have a dreamlike quality that are created through a combination of the distortions built into the camera and the color saturation created by cross-processing of the film.
I’ve been thinking about buying a Lomo for years but every time I come close, I back away because of two things. The first is the hassle of finding someone to do cross processing of the film, most corporate shops won’t do it and those are the same places that are driving the mom and pop operations out of business. The second issue revolves around the potential environmental harm of the processing chemistry itself.
Still, I like the esthetic of images produced by Lomo cameras and want to produce those types of images myself. I’m still thinking about buying a Lomo but in the meantime, I’ve decided to tinker with creating similar images digitally. I’ll call them digital images in the style of Lomo since I’m sure that diehard Lomographers would have a stroke if I called them digital Lomos. Here are a couple of examples:
If you’d like to see some actual Lomo images and learn more about the Lomography movement, jump on over the the Lomo website.
by Steve | Jan 31, 2010 | Workshops |
Day three was a productive day as everyone worked on their projects, there were a few demos but overall people had their attention focused on finishing up their stuff.
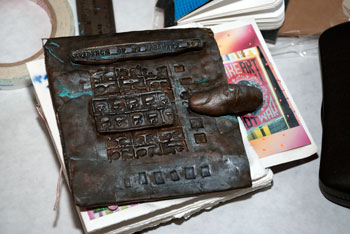
Andrew’s Steampunk Journal looked great. He created it using an old clock spring, some watch parts and Ice Resin. I thought the texture he used on the surface of the clay was very nice and was surprised to find out he used some metal corset boning to create it. Andrew is a fashion designer and apparently, he carries some around with him.
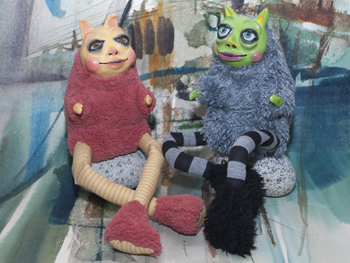
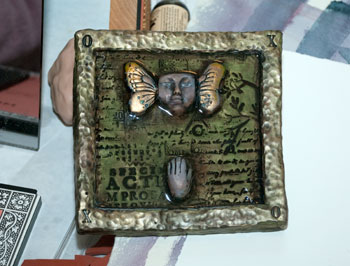
Keeley spent the time working on her creatures. Their faces were so perfect that I assumed that they were made from a mold. But as Keeley talked about the work she told me that’s not the case, each one is individually sculpted. Her material of choice is PaperClay and that that I’ve seen a good example of what you can create with it, I may have to reevaluate it as a creative tool.
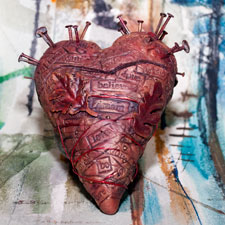
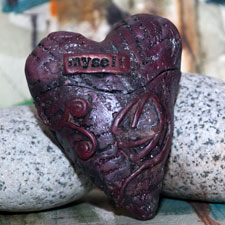
At least two polymer clay heart boxes were under construction but I know there were more.
by Steve | Jan 30, 2010 | Sculpture, Workshops |
Most people settled into the routine of just making things today or journaling today. Several people who had started polymer clay books yesterday finished them today by completing the baking process and painting them. A few people, myself included continued working with the polymer clay and made boxes that were shaped around organic forms. Some molded forms like a heart out of foil, I used a rock.
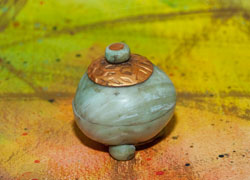
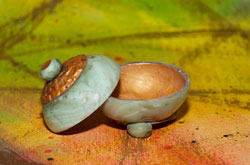
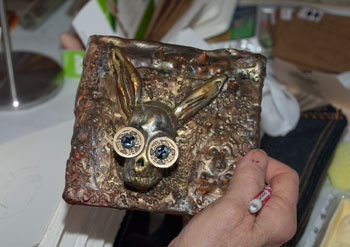
Some of the other PLAY participants were admiring my tiny jade book and The Books of the Jade Skulls. They asked about the technique I use to create the faux jade with polymer clay so I set up a demonstration and taught them how to make it. The demonstration left me with a piece of faux jade clay, I thought about making another small pocket book with it but instead I decided to make a box. I covered a rock with a layer of gold clay, then covered the first layer with the faux jade.
by Steve | Jan 29, 2010 | Workshops |
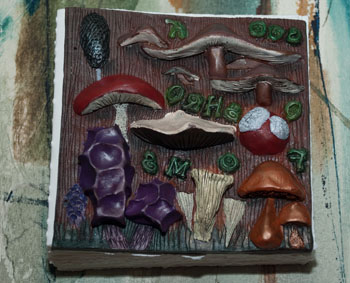
Day one of PLAY was all about polymer clay. Tracy Moore taught his Relic Journal and demonstrated how to make journal covers using polymer clay and jewelers resin to build. This is a similar technique I used for The Book of Jade Faces, but the surfaces are painted instead of composed using colored clays. Several people were new to polymer so there were lots of questions of questions and some trial and error. There was a wide variety of styles from completely organic forms to some highly structured compositions. I’d have to give the “Eye for Detail” prize to Matt who created a forest of mushrooms on his cover complete with the gills on the underside of each mushroom.
Here are a few more examples of what people were working on in various stage of completion.