by Steve | Feb 27, 2010 | Bookbinding |
I was reorganizing my bookshelf last week and stumbled across a book I made back in 2004. It’s a small pocket journal whose dimensions are about 3″ X 4″ and it had fallen behind several other books and been forgotten. I can remember making this book because it turned into something I hadn’t intended when I started making it. Whatever I had in mind when I started this book changed along the way. I was beginning work on the cover and NPR had a remeberance about Jerry Orbach the actor that played Lenny Briscoe on Law & Order, he died in December of 2004. As I continued working on it, he book somehow morphed into The Book Briscoe. One of the things the Briscoe character was famous for was the sarcastic quip he typically uttered early in each episode as a dead body was discovered.
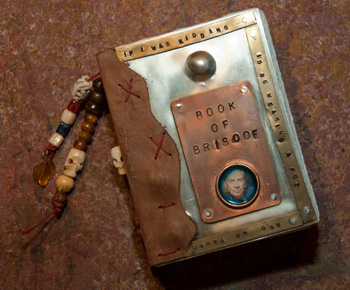
I have a personal favorite and I embossed it into the brass strip that runs around the edge of the front cover, in the event you can’t see it in the photograph, it says; “if I was kidding I’d be wearing a Fez and no pants”. I don’t know that I’d call this a tribute book because that really wasn’t my intent when I made it but it did start me thinking about possibly making a tribute book for Captain Phil Harris. For those who don’t know, Phil Harris was the captain of the fishing vessel Cornelia Marie, a crab boat featured on Discovery Channel’s Deadliest Catch series. Any time I would think about how bad my job was, all I had to do was watch an episode or two of Deadliest Catch to put it all in perspective. Phil Harris died on February 9th, 2010 after suffering a stroke on January 29th. It seems to me that metal would be my material of choice but time will tell as I continue to think about where I want to go with this idea.
by Steve | Feb 19, 2010 | General |
It’s funny how fortuitous happenstance works which is why I suppose it’s called fortuitous happenstance in the first place. A recent collision clogging the freeway forced me to bail onto the surface streets and as it happened my detour required that I drive by the local woodworking shop. Knowing that the wood supply in my studio was getting low I decided to stop and see what they had on hand. I often use wood when binding my journals, even when I make journals out of polymer clay, the back cover is almost always wood. While I like using wood for the very practical reason of workability there’s a wider range of aesthetic reasons that I find it compelling as a raw material.
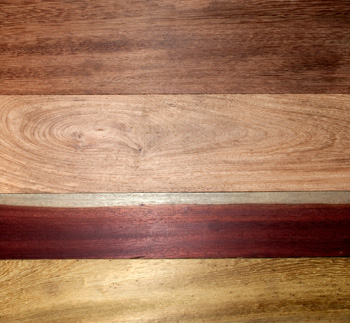
The only problem I have with wood is finding it in the thicknesses I need for bookbinding, I want it no more that 1/4″ thick. Sure, I can order it online but I’m not crazy about buying it sight unseen — I want to be able to see the color and the grain when I choose my wood. Occasionally I’ve been able to find thin hardwood at this store but it’s often hit or miss and something they don’t stock regularly. This time, there was a whole rack of it and I bought four boards in widths of four and six inches — my choices based solely on the interplay between the color and grain of the wood.
Two of the boards were Peruvian Huayruro, one was Bloodwood and one was Brazilian Yellow Heart. In the picture below you can see what I mean about the interplay of grain and color, while the top two boards in the picture are both Huayruro the color and grain patterns are significantly different. I’m already thinking about the books these boards will turn into.
by Steve | Feb 10, 2010 | Technology |
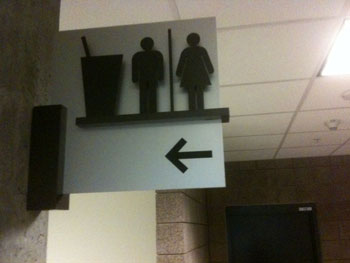
The current crop of HD video cameras are great but I don’t know that I’d want to throw one into the bag I carry my journal around in — it would get trashed in relatively short order. While There’s always a small digital camera for grabbing pictures of things that I want to explore in one way or another later on or for capturing images of things that amuse me for some reason at that particular moment like the sign below.
Documenting your artwork is always a good thing and although I have access to several very good quality video cameras over the past few months I’ve been thinking about getting a pocket size video camera — something that could ride around in my bag and be pulled out at a moments notice and something I could blow off were it lost, stolen or damaged. I wasn’t concerned with super high-def panoramic cinematic excellence , I was more interested in capturing the moment. The Flip series of cameras seemed like the logical choice but as I did some research, I stumbled across the Kodak Zi8 which is a direct competitor to the Flips — in the end I chose it over the Flip for three reasons.
First, the thing I hate about most about these types of cameras is the crappy audio quality; above all the the external microphone jack is what sold me on the Zi8. With it, I can plug a good microphone in and get excellent audio. The second feature of the Zi8 that appealed to me was the ability to use an SD card and a replaceable battery — If I get to the end of the road with storage or juice, a quick swap gets me going again. The third and final factor was video quality, my personal preference in side-by-side comparisons was the Zi8. The day that I chose to see how much it cost on Amazon was the closer, by chance it was $30.00 off that day which made it a $150.00 investment.
Even though I got it around the holidays I didn’t actually have time to tinker with it until I was at PLAY and my goal in using it at PLAY was to see how fast I could throw together event documentation. To put the video below together I intentionally relied on iMovie and one of its default templates instead of the more robust video editors I have access to. While it may be cheesey, the total time to whack this thing together not including the 25 minutes it took to actually upload it to YouTube — about 35 minutes.
If you want to see more information about the Kodak Zi8, Amazon is a good place to start, click on the image below to get there:
[amazonshowcase_3349d8801c83edbcbb54b059abf4c01e]
by Steve | Feb 8, 2010 | Polymer Clay |
I’ve made polymer clay boxes in the past but normally they meant to be a container for a book. Normally, I make my boxes in one of two ways. I either bake all the parts and then assemble them with a second baking or bake the box on a mold that I’ve fabricated from wood or book board. The size of the box depends on the book I’ve made how how I want it to be presented, I also tend to keep these pieces small because of the sense of intimacy they create.
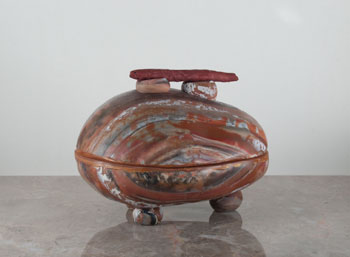
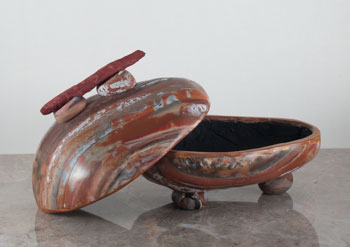
While I was at PLAY last week one of the options available was making rock boxes. For the most part a rock box involves little more that wrapping a rock in polymer clay and baking it. The technique isn’t significantly different then the one I use for making my boxes except for a couple of tricks for getting the box off the rock once it’s baked. I started the box pictured below while I was at PLAY, I’d been tinkering with making a journal cover using Mokume Gane and still had a large piece of it left over. To create the effect on the surface of the box I covered a base sheet of clay with slices of the Mokume Gane and then ran it all through the pasta machine several until the distortions resembled banded agate.
The dimensions of this box are about 4 1/2″ X 3 1/4″ and it’s about 3 3/4 high. The interior of the box is simply finished with a good quality black gesso. The exterior is was wet sanded with 600, 800 and 1200 grit sand paper and then buffed on my bench grinder.
by Steve | Feb 3, 2010 | Photography |
I’ve been taking photographs for as long as I can remember and like many others they get incorporated into my journals. I’m a also a big fan of “experimental” photography and I’d say that Lomography falls into that category. For those who don’t know, Lomography is a art movement that has grown up around the Lomo camera. Originally produced in Russia and now in China, the noteworthy feature of the camera is it’s imperfections. The manufacturing process creates a lens that creates vignetting and distortions in the image and the distortions vary from camera to camera. Images from Lomo cameras tend to have a dreamlike quality that are created through a combination of the distortions built into the camera and the color saturation created by cross-processing of the film.
I’ve been thinking about buying a Lomo for years but every time I come close, I back away because of two things. The first is the hassle of finding someone to do cross processing of the film, most corporate shops won’t do it and those are the same places that are driving the mom and pop operations out of business. The second issue revolves around the potential environmental harm of the processing chemistry itself.
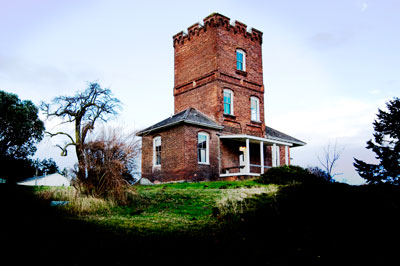
Still, I like the esthetic of images produced by Lomo cameras and want to produce those types of images myself. I’m still thinking about buying a Lomo but in the meantime, I’ve decided to tinker with creating similar images digitally. I’ll call them digital images in the style of Lomo since I’m sure that diehard Lomographers would have a stroke if I called them digital Lomos. Here are a couple of examples:
If you’d like to see some actual Lomo images and learn more about the Lomography movement, jump on over the the Lomo website.